
MasBrowser
Customer supportLoading messages…
Loading messages…
You are viewing a previous conversation.
Enter to send · Shift + Enter for a new line
Loading messages…
You are viewing a previous conversation.
Enter to send · Shift + Enter for a new line
New to fingerprint browsers, you have probably felt this confusion: you finally downloaded one (say, MasBrowser), opened the client, and found a row of features on the left (Environment Management, Proxy Management, Environment Groups, Automation...), with no idea where to start. Search for tutorials and you only find mid-level content about "creating environments" and "configuring fingerprints" — nobody clearly explains "what to do first after installing".
This guide is written for beginners: from what to prepare before installing, to downloading and installing, logging in and learning the main interface, then creating your first environment and launching it for verification — the complete path from "zero to your first environment running". The operational details of creating environments (fingerprint config, proxy binding) have full tutorials elsewhere; here we only cover the points where beginners make mistakes, no repetition.
Spend 5 minutes preparing these three things before installing, and you can get started right away:
With these three ready, download and install goes smoothly.
Using MasBrowser as an example, installing the client takes three steps (specific buttons follow the product UI):
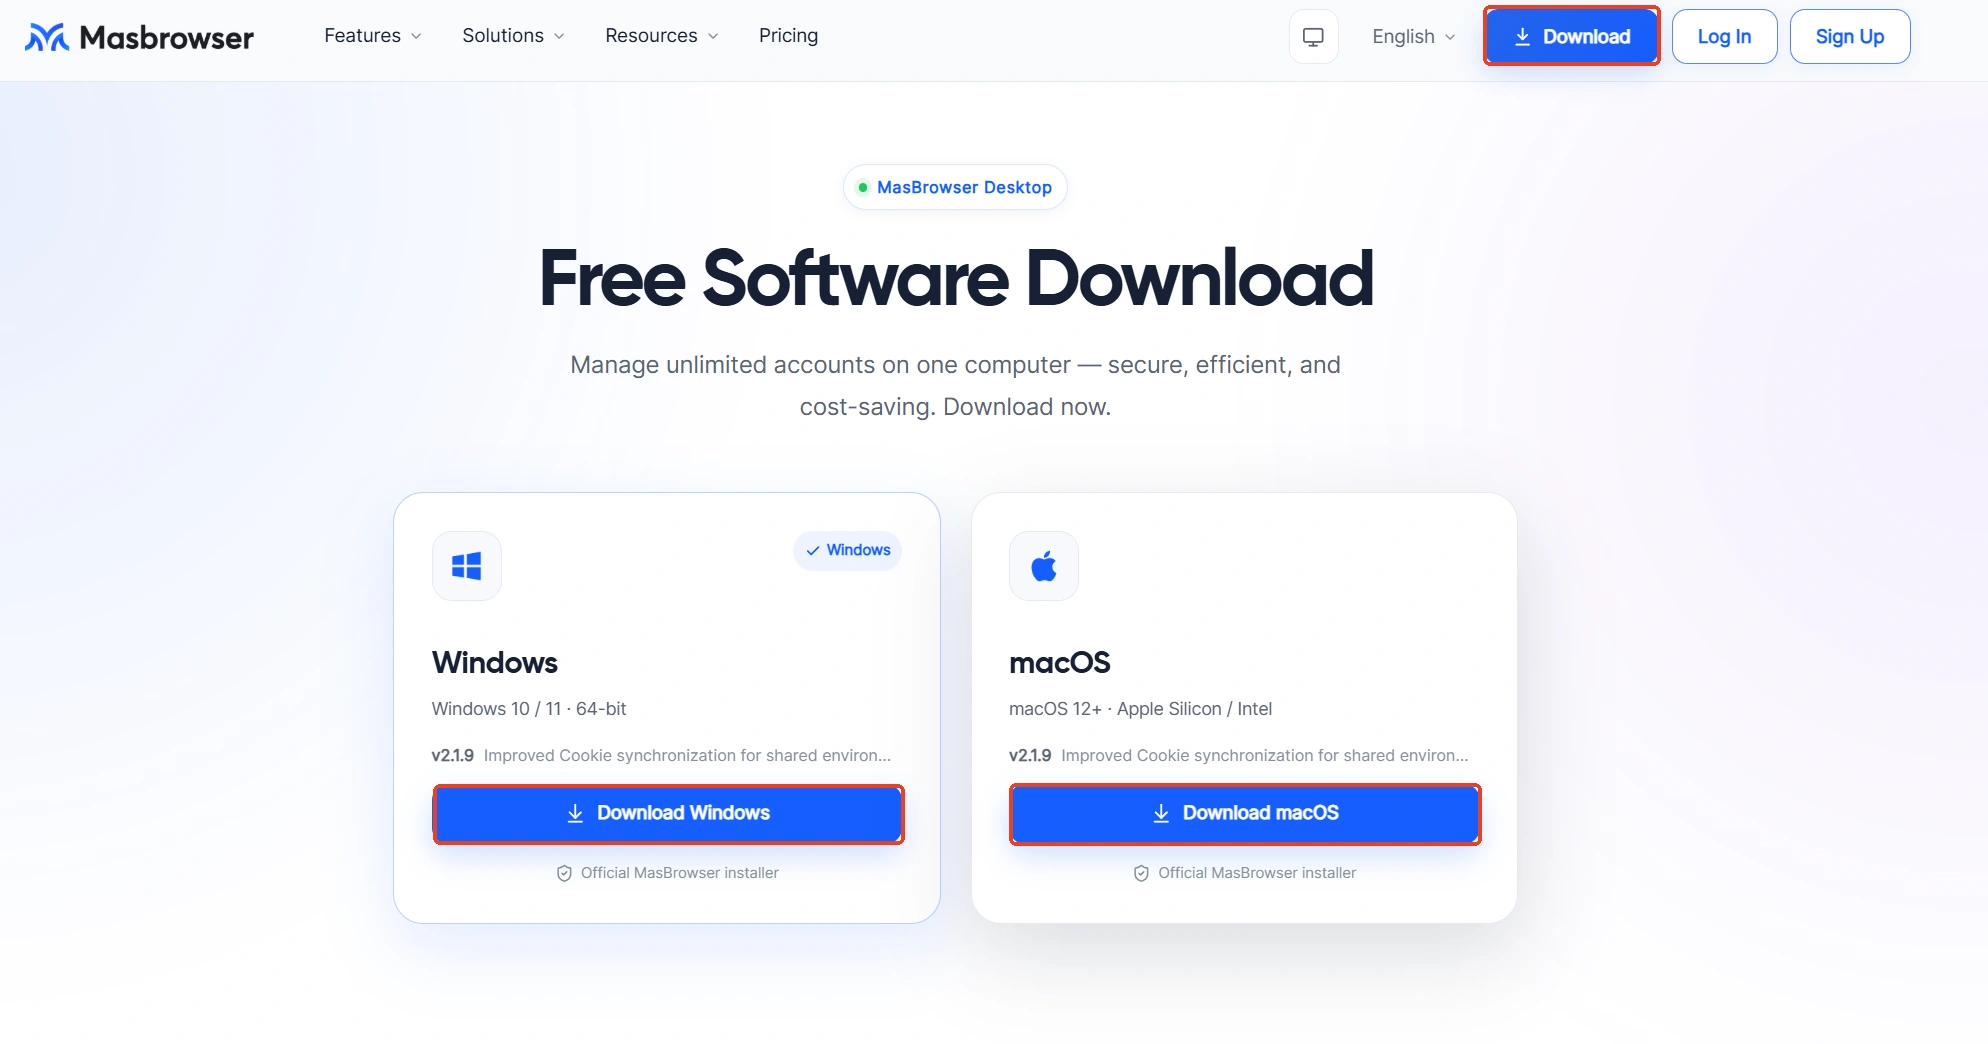
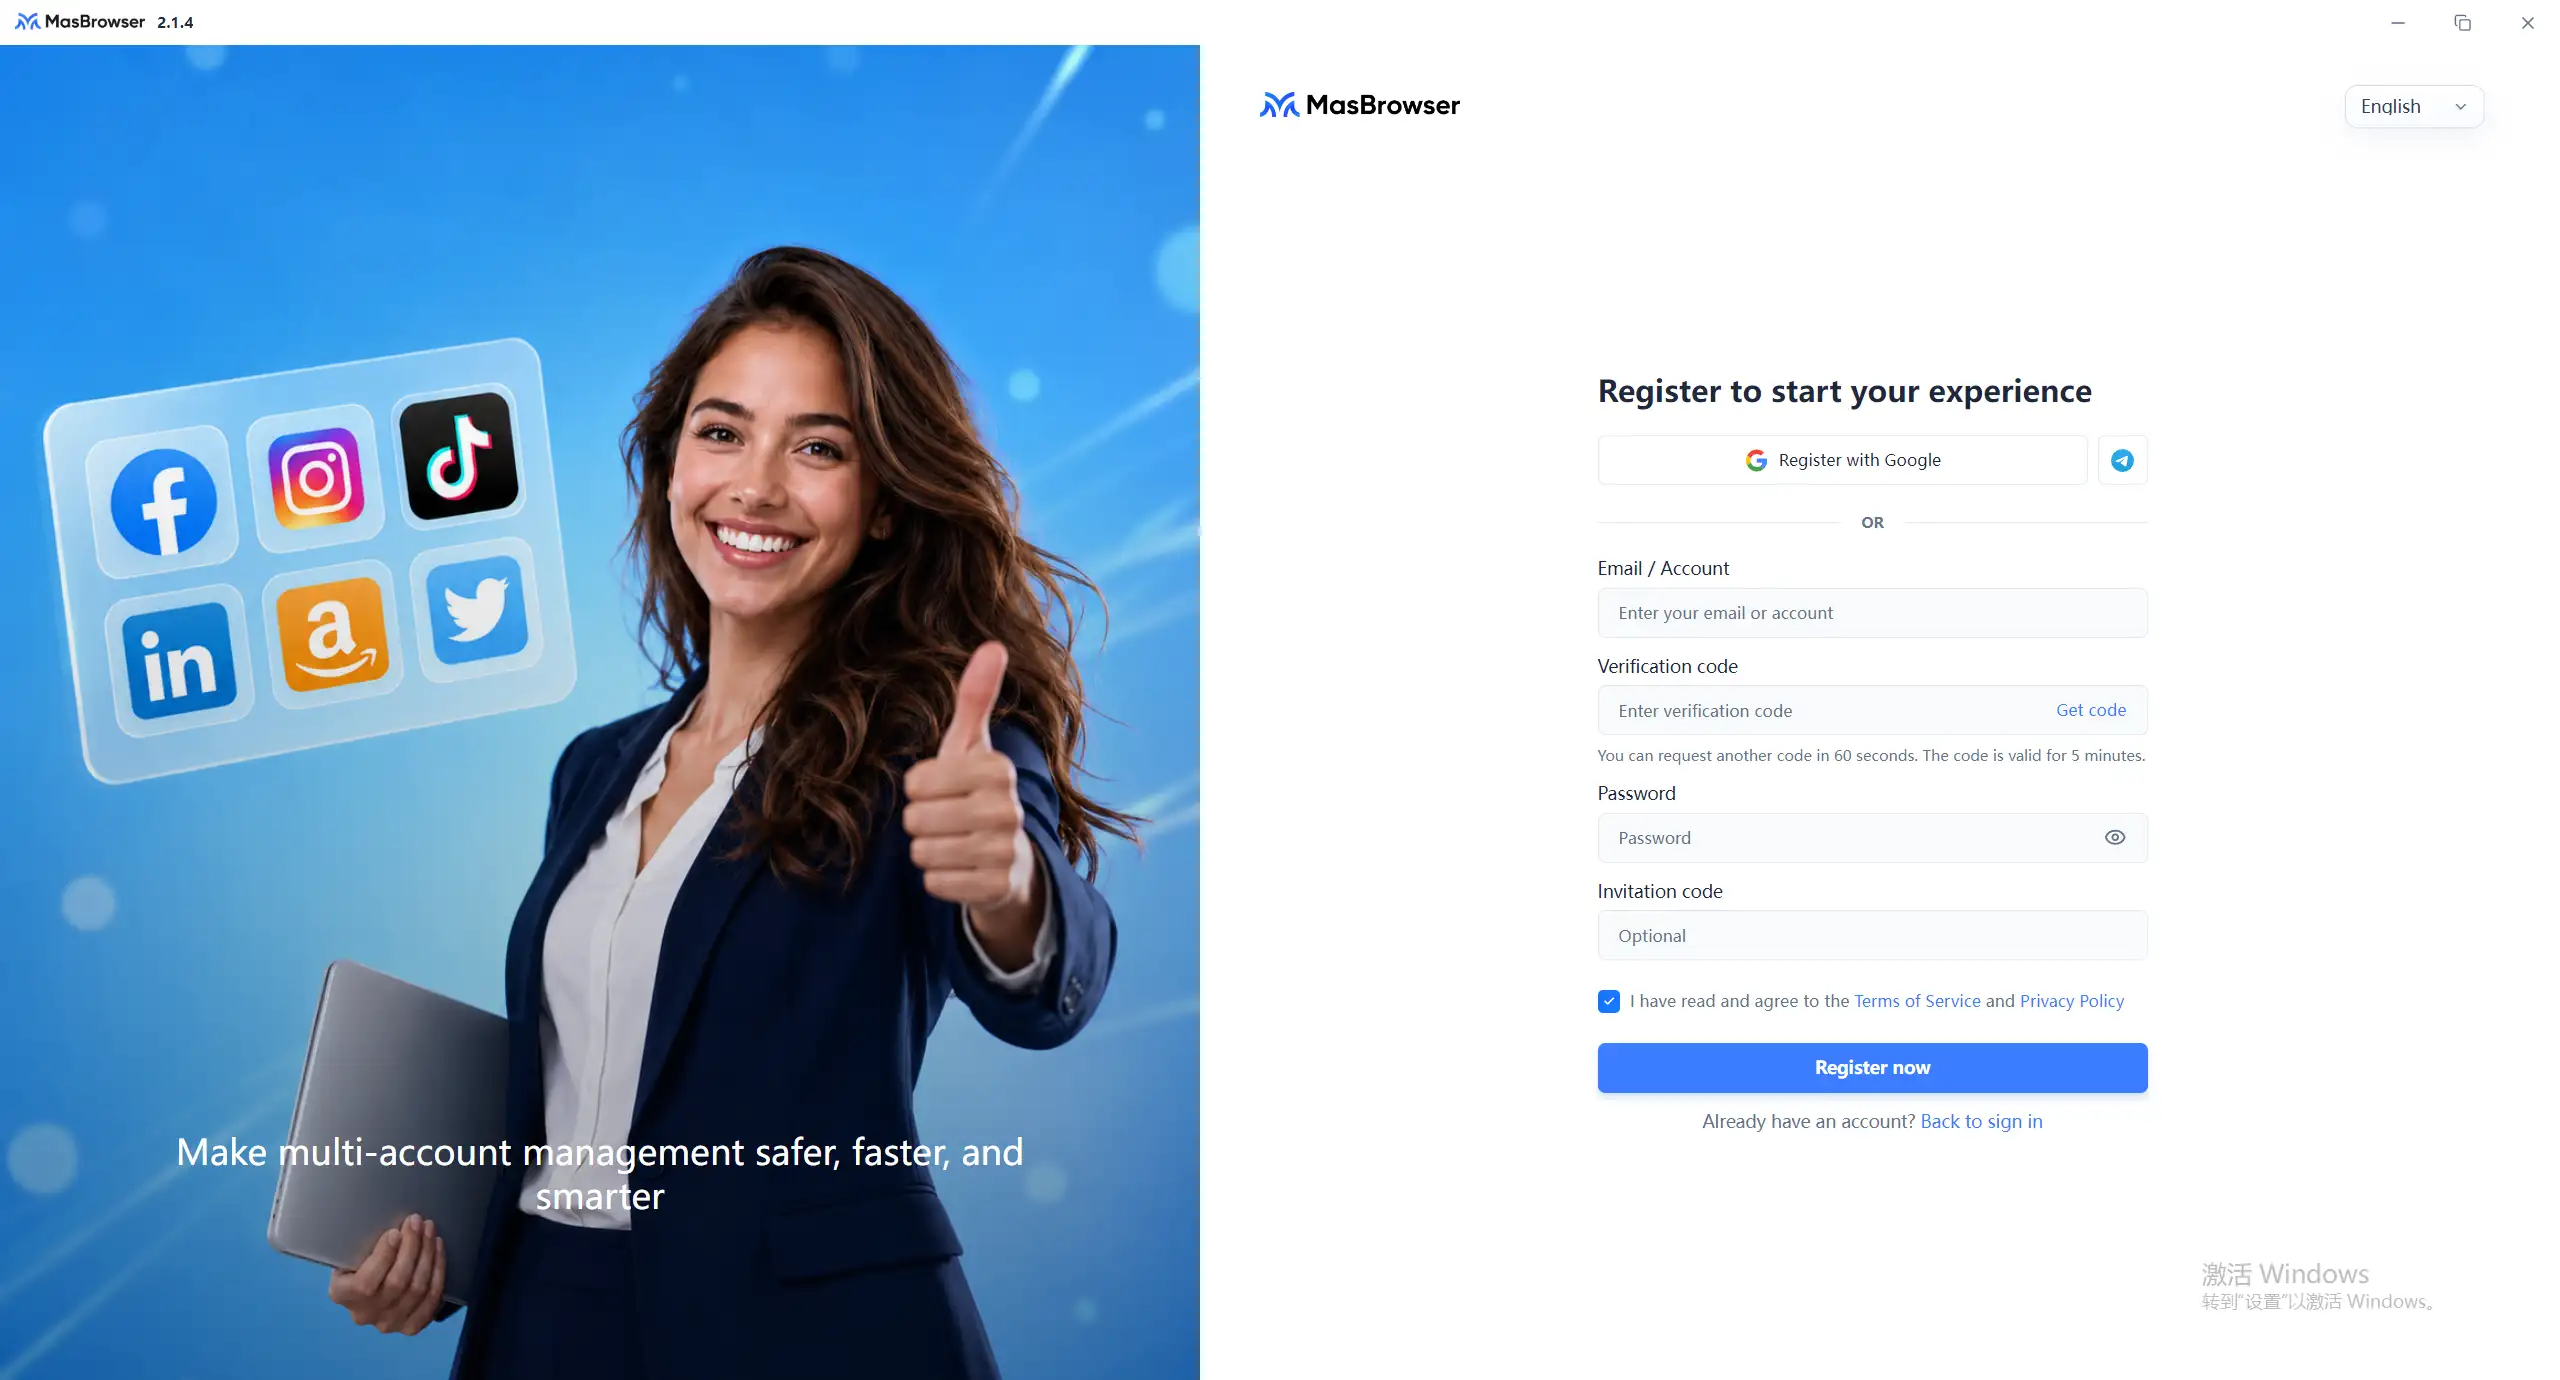
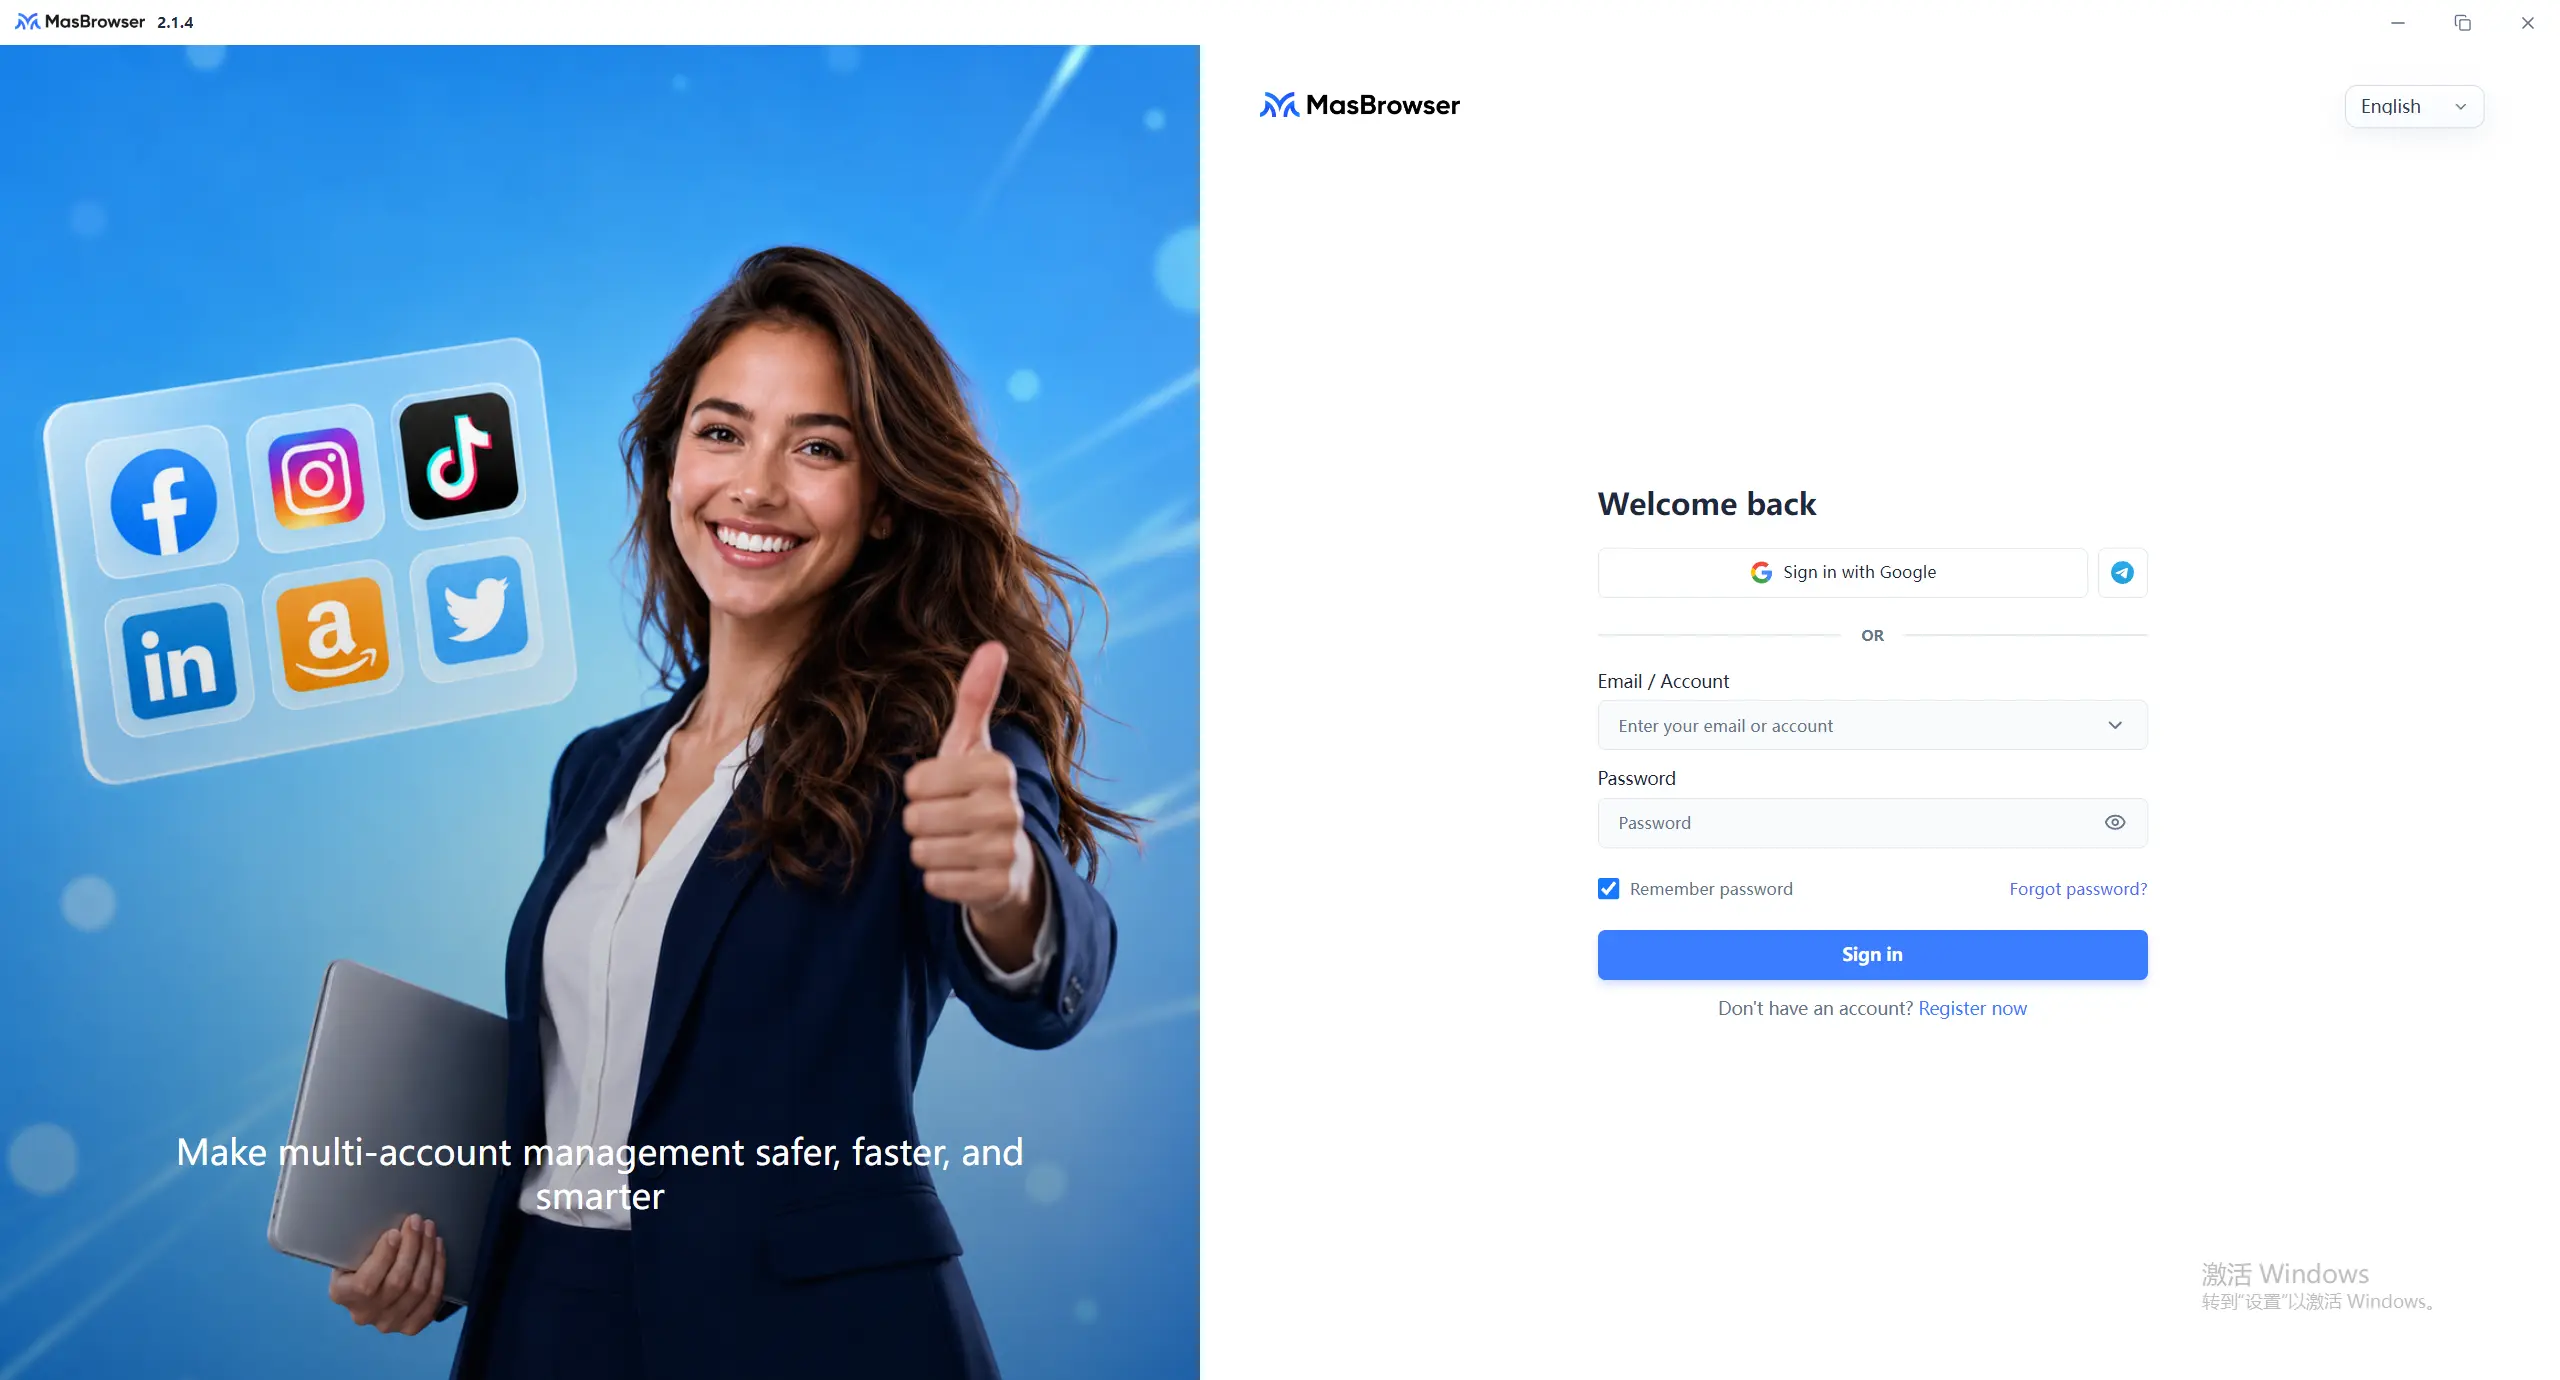
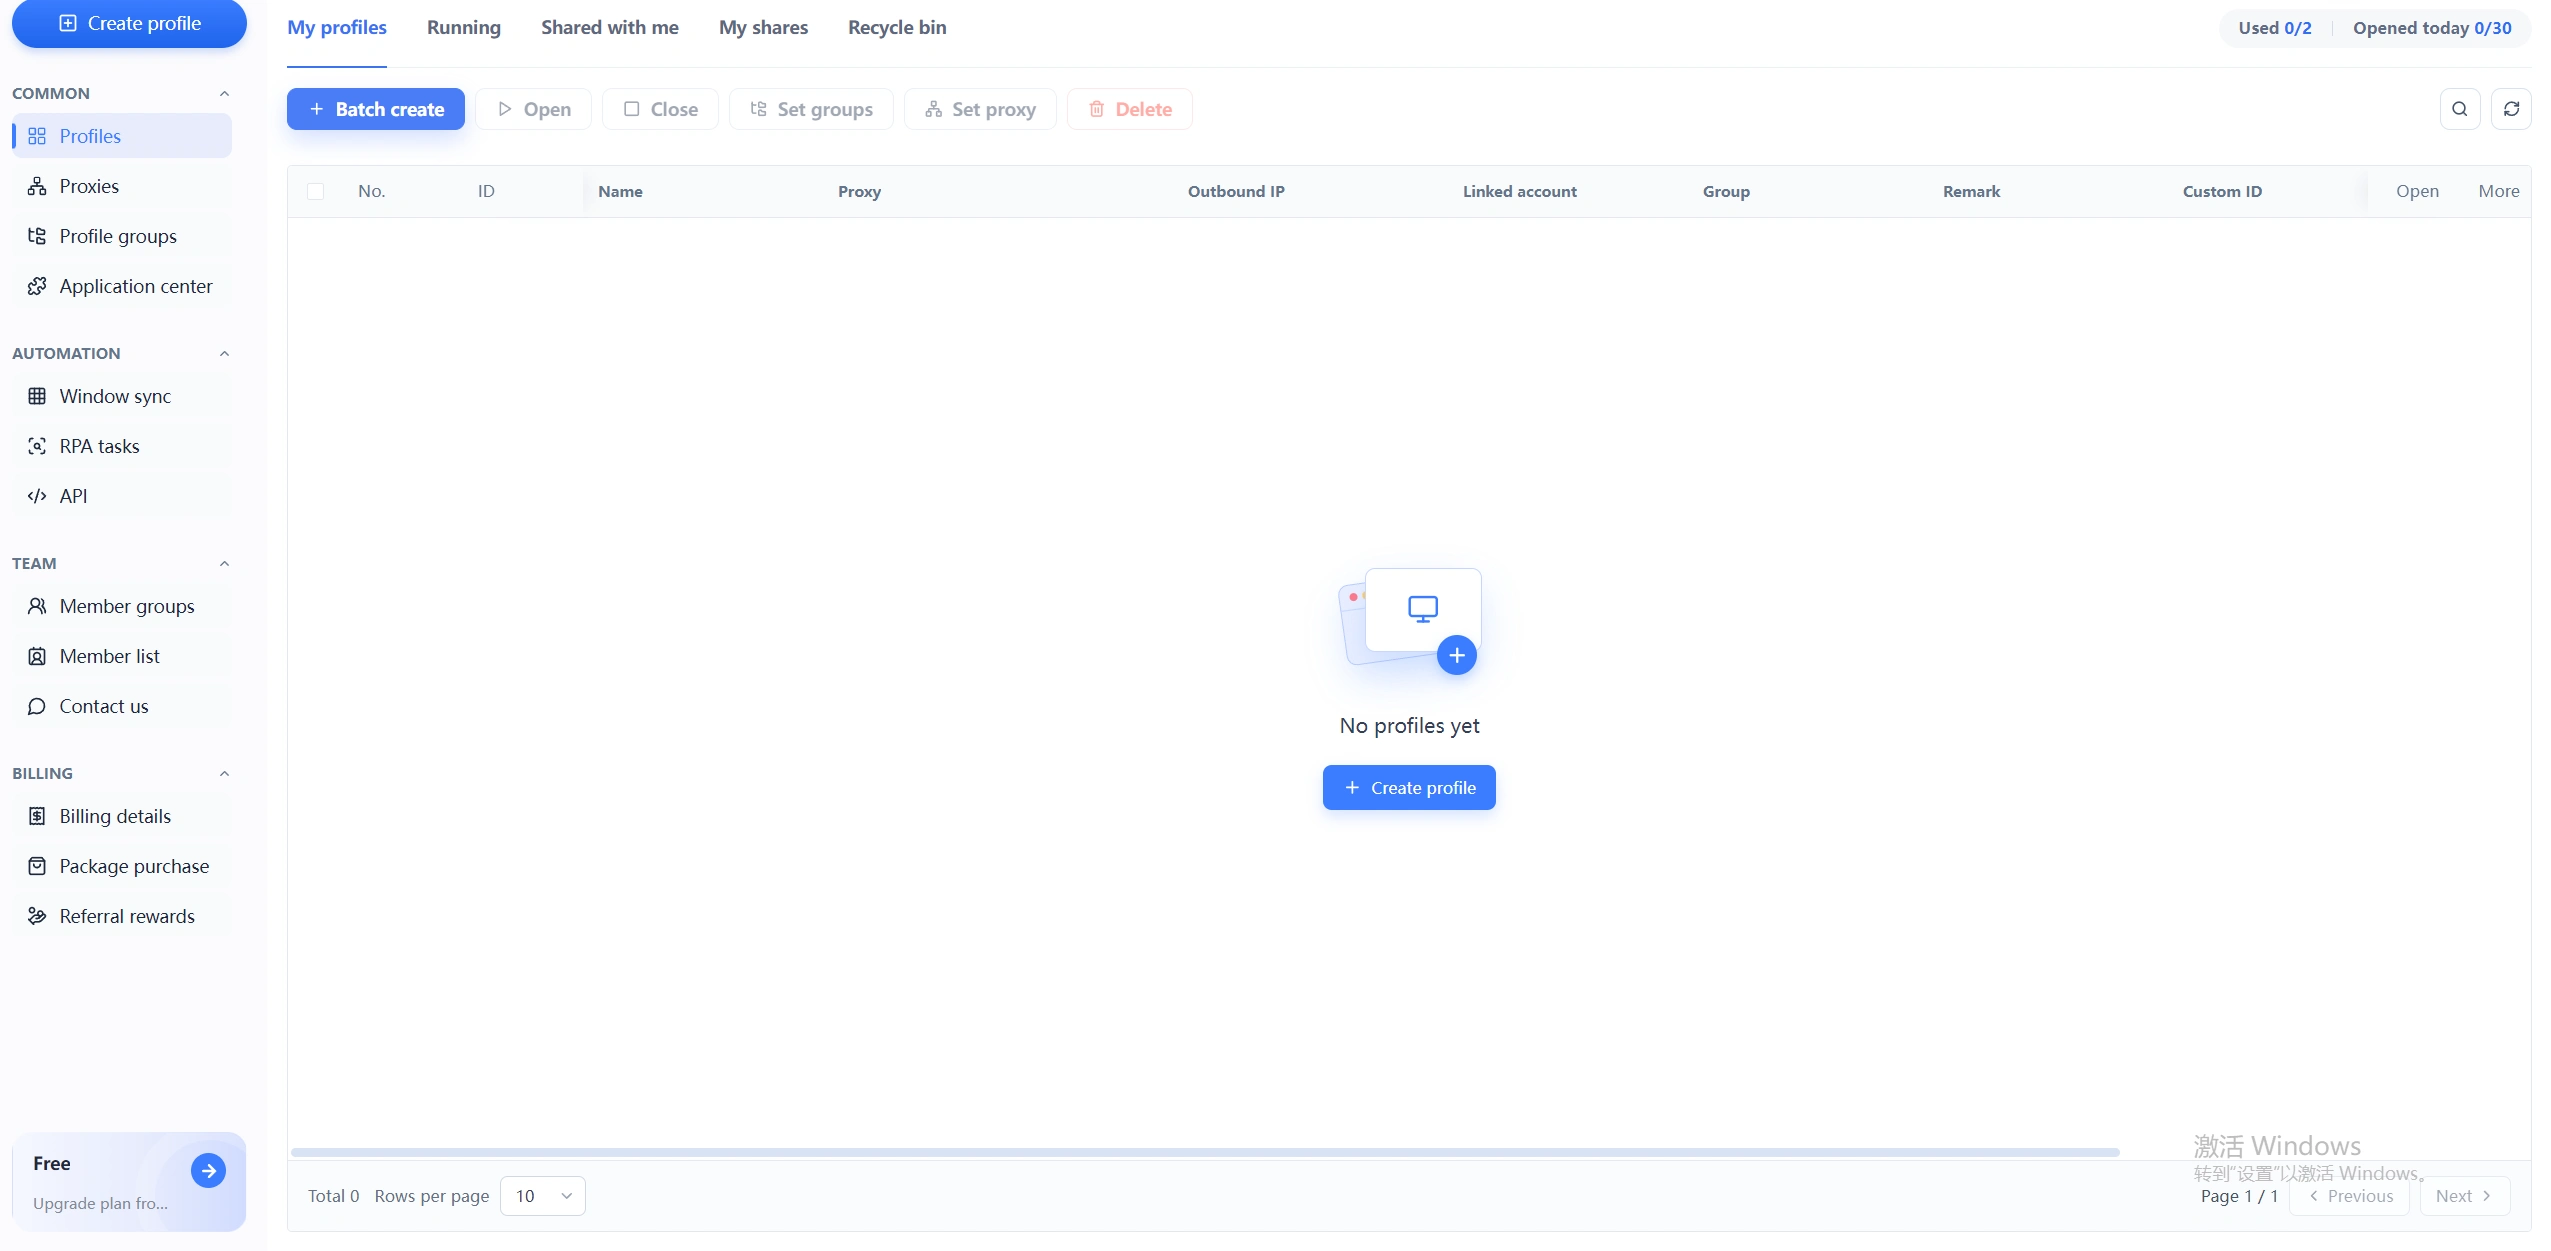
The core of the three steps is "download the right version → register and log in → enter the main interface" — beginners most often get stuck on "downloading the wrong version" and "not knowing where to go after registering"; recognizing the "Environment Management" page is the right starting point.
After logging in, don't rush to create environments. Spend two minutes learning the left menu — there are four types of function areas:

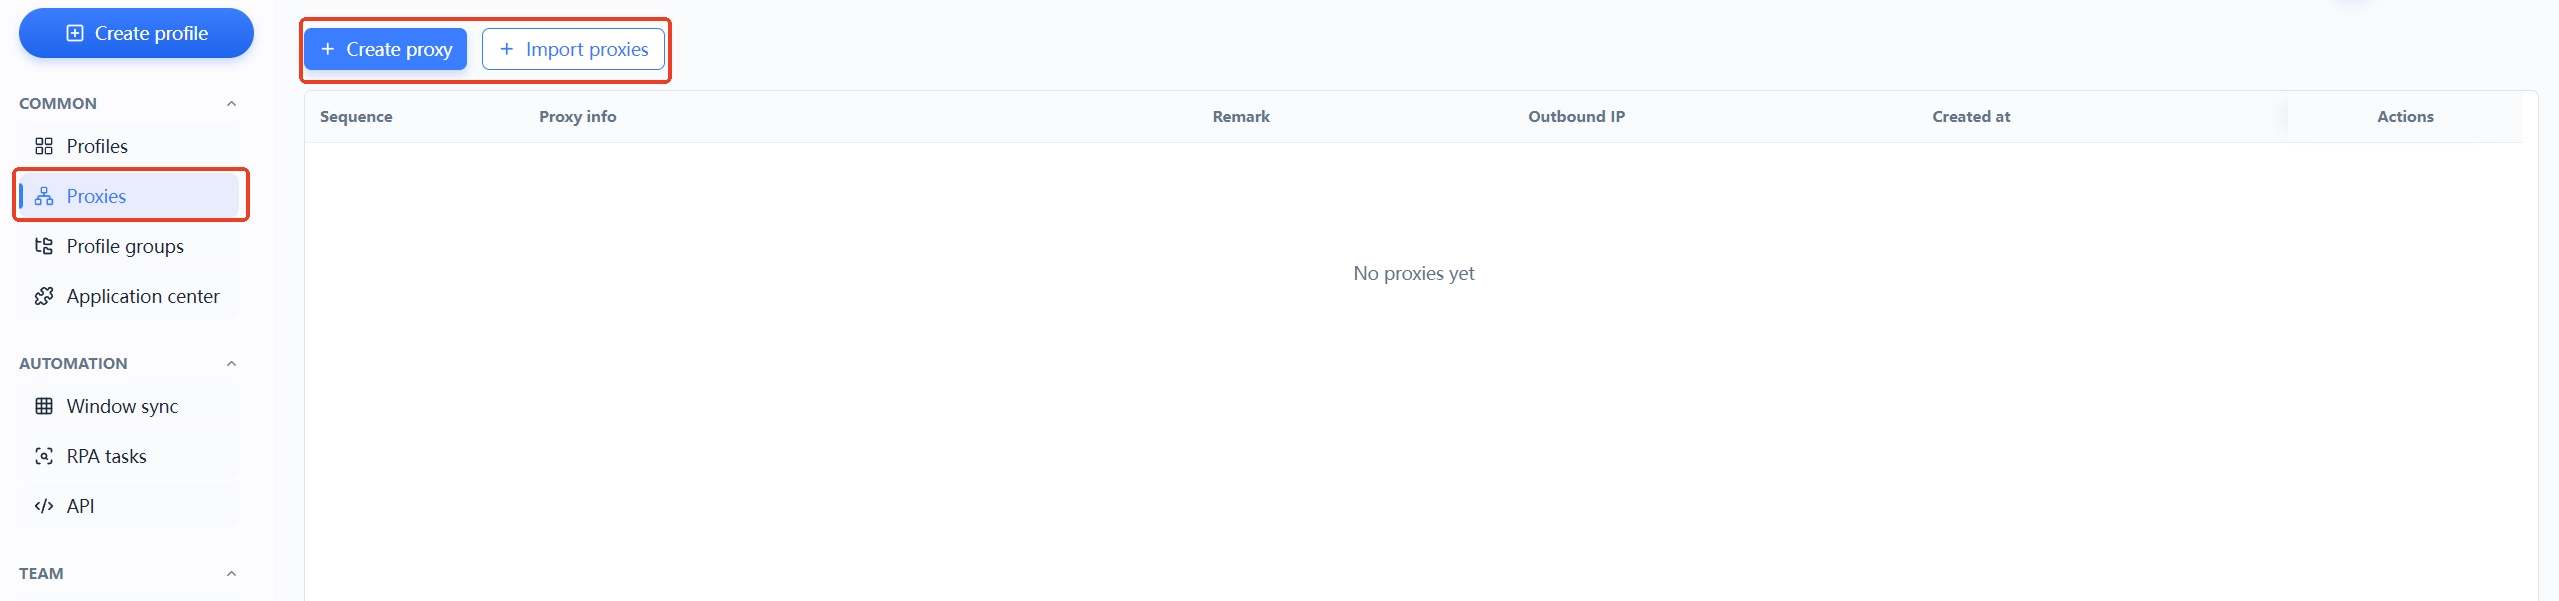
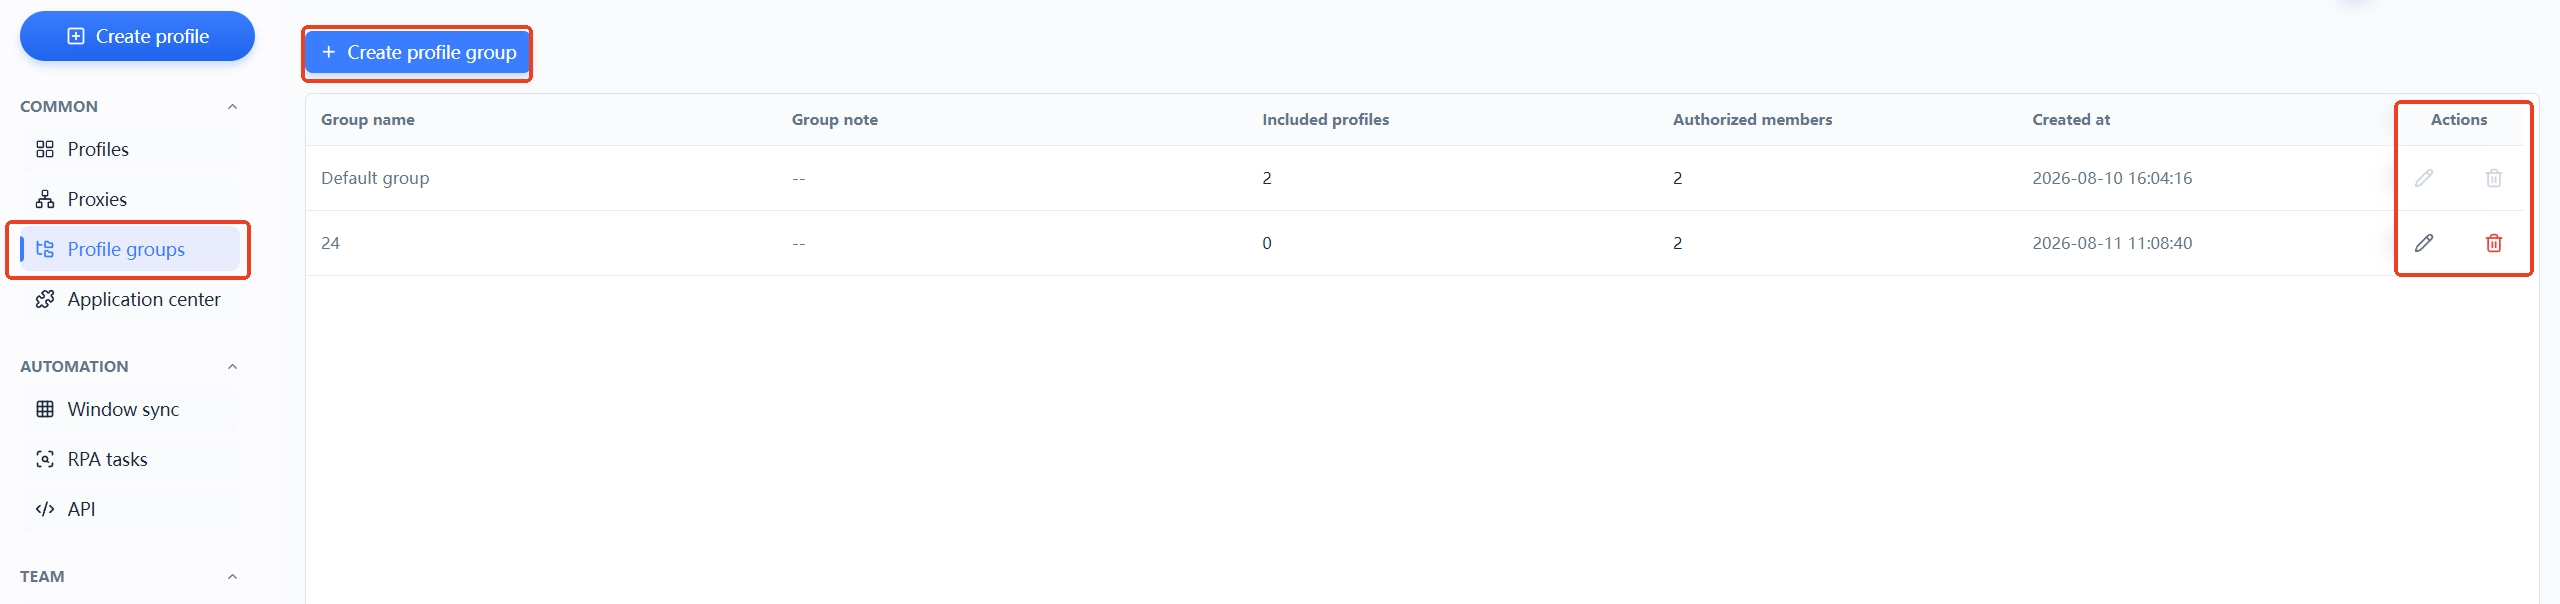
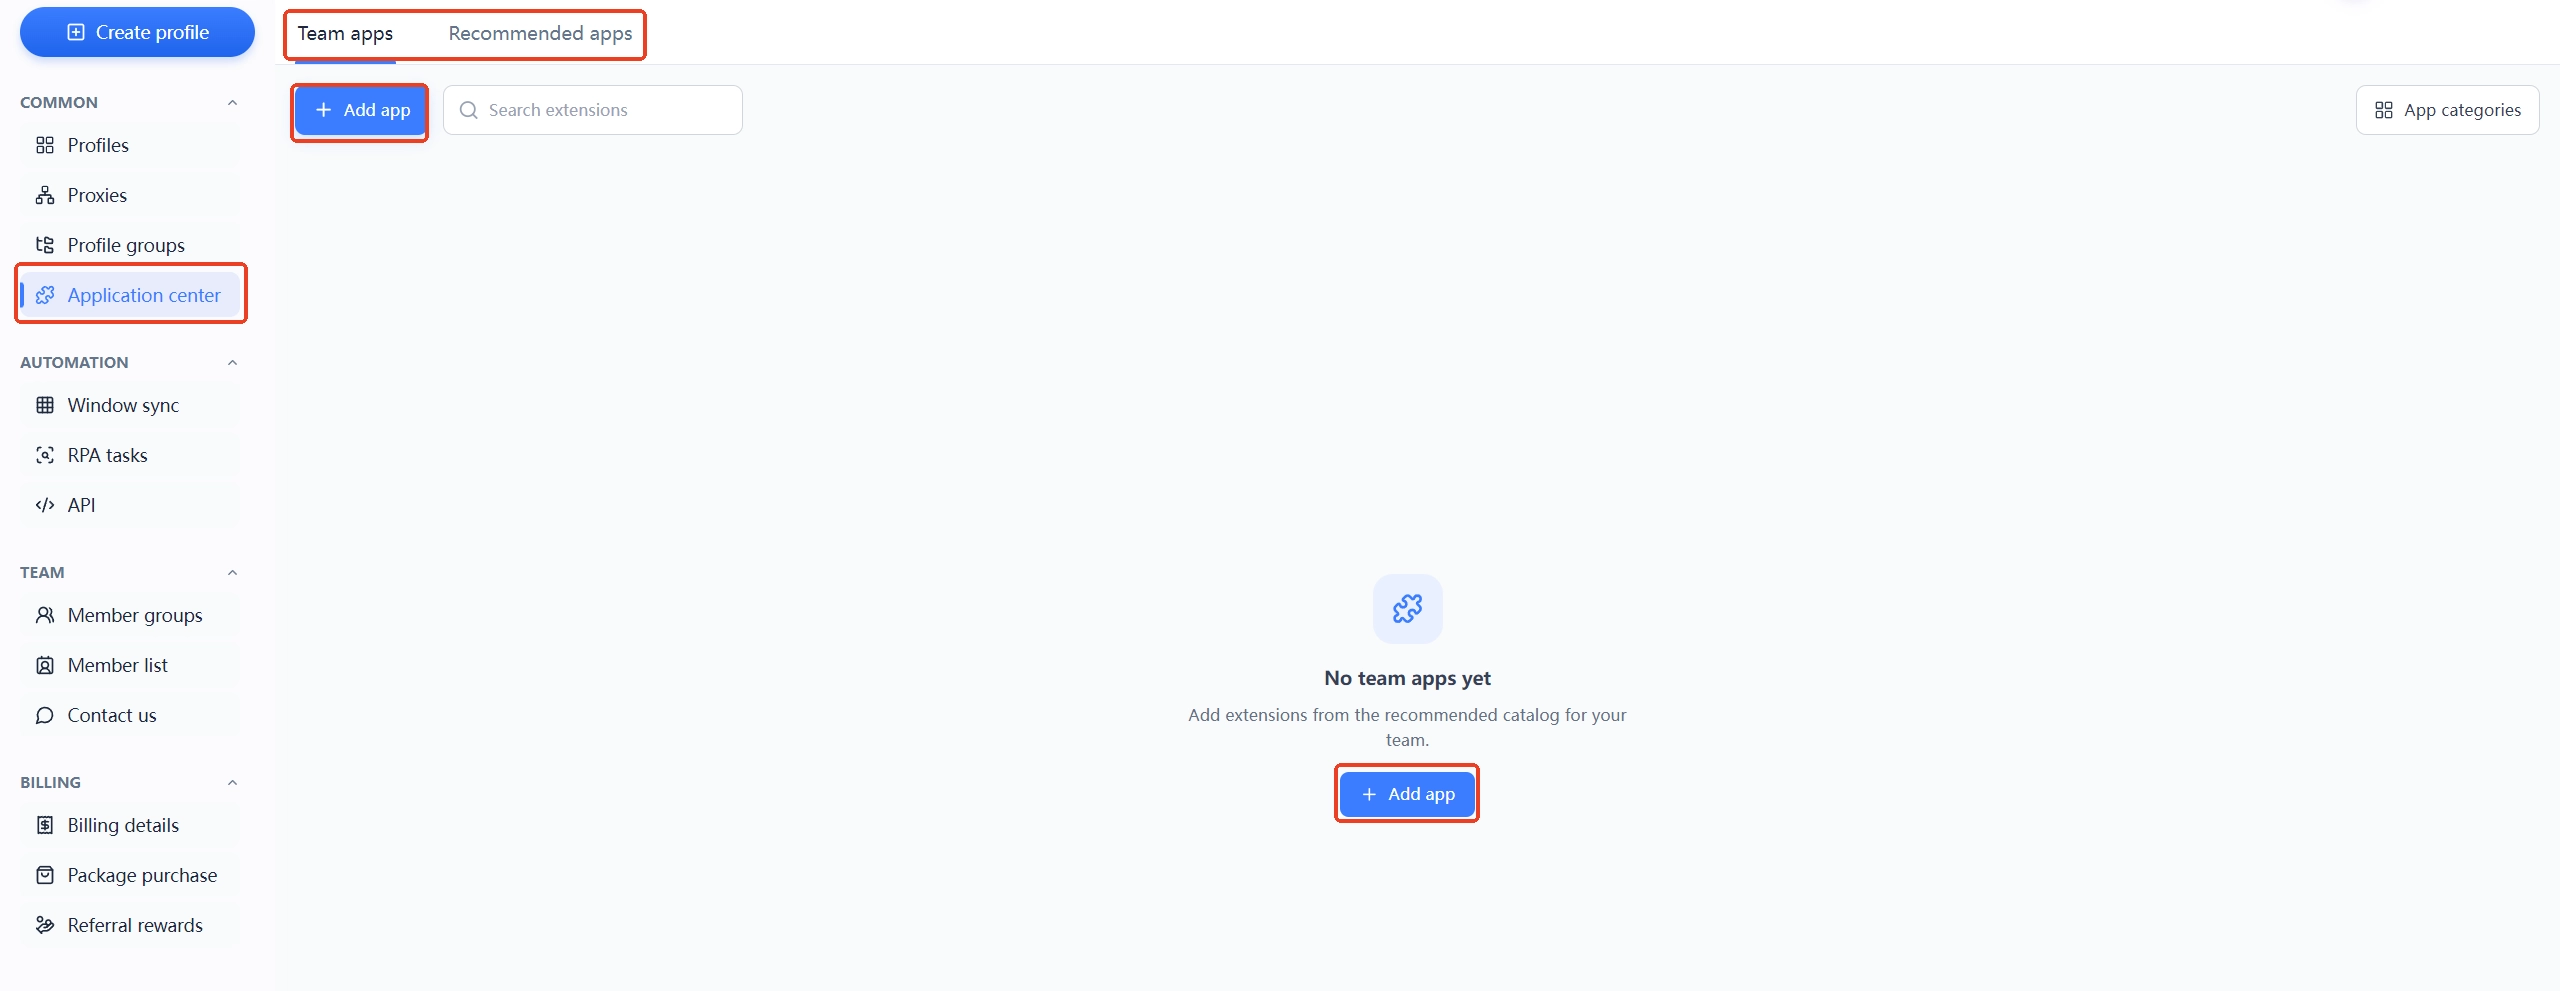
One sentence to remember the main interface: Environment Management handles "environments", Proxy Management handles "IPs", Groups handle "categorization", App Center handles "extensions" — the four areas each do their own job; once familiar, you basically won't get lost.
The complete flow for creating environments (register/log in → enter Environment Management → fill basic info → configure fingerprints → launch and log in → verify isolation) is fully covered in What Is a Fingerprint Browser; no repetition here — we only cover the three things beginners most often get wrong:
amazon-us-store01, fb-matrix-01), don't use "Environment 1", "Environment 2" — with many environments, uninformative names mean you can't tell which is which.Do these three things right and your first environment is basically solid.
The mistakes of the beginner phase concentrate in these four:
The common thread of these four pitfalls: they're all caused by "rushing" — rushing the download and grabbing the wrong version, rushing to log in and forgetting the proxy, rushing operations and using one environment for many accounts. Slow down in the beginner phase; confirm each step before moving on — that's actually the fastest way.
The software itself is free to download and install. MasBrowser's free plan provides 2 environments ($0 per year) for long-term use, and running through the basic flow requires no payment; when your account matrix grows and you need more environments, upgrade (Professional starts at 10 environments, annual discounted price $40.80).
Check three things first: ① does the system version match (Win/Mac swapped?); ② is the installer complete (re-download from the official site); ③ is antivirus software blocking it (add to whitelist). Most "won't open" cases are the first two reasons; re-downloading the installer from the official site usually solves it.
MasBrowser's free plan has a quota of 2 environments — enough to run through the complete "create environment → configure fingerprints → launch → log in" verification flow; upgrade when you need to manage more accounts (Professional starts at 10 environments, Advanced at 100, both with annual discounts).
Create the environment first, then configure its proxy (order: new environment → fill environment name in basic info → fill IP/port/account/password in proxy settings → select "Configure based on IP" in fingerprint config → launch). Make sure the proxy is configured and passes testing before logging into platform accounts; wrong order can trigger risk control at login.
Environment data is in the cloud (synced by the client). After switching computers, re-download and install, log in with the same account, and the environment list syncs back (each environment's login states/fingerprint config follow your account). Log into the client with the same account and your environments are there.
Getting started with a fingerprint browser is really four steps: prepare three things (system/proxy/account) → download and log in → learn the main interface → create the first environment. Don't be intimidated by the interface — you'll spend 90% of your time on the "Environment Management" page; learn the rest when you need them.
In the beginner phase remember three things: download the right version, configure a proxy before logging in, one environment for one account — do these three right and your first environment is solid. The free plan's 2 environments are enough to run through the flow; start by downloading MasBrowser from the official site and create your first environment — install, log in, create an environment, all done within ten minutes.